
How to Build a Swale and Where to Put the Spillway
A step-by-step guide to building a swale on contour: checking the site, finding the level line, digging, planting, and placing the spillway so overflow is safe.
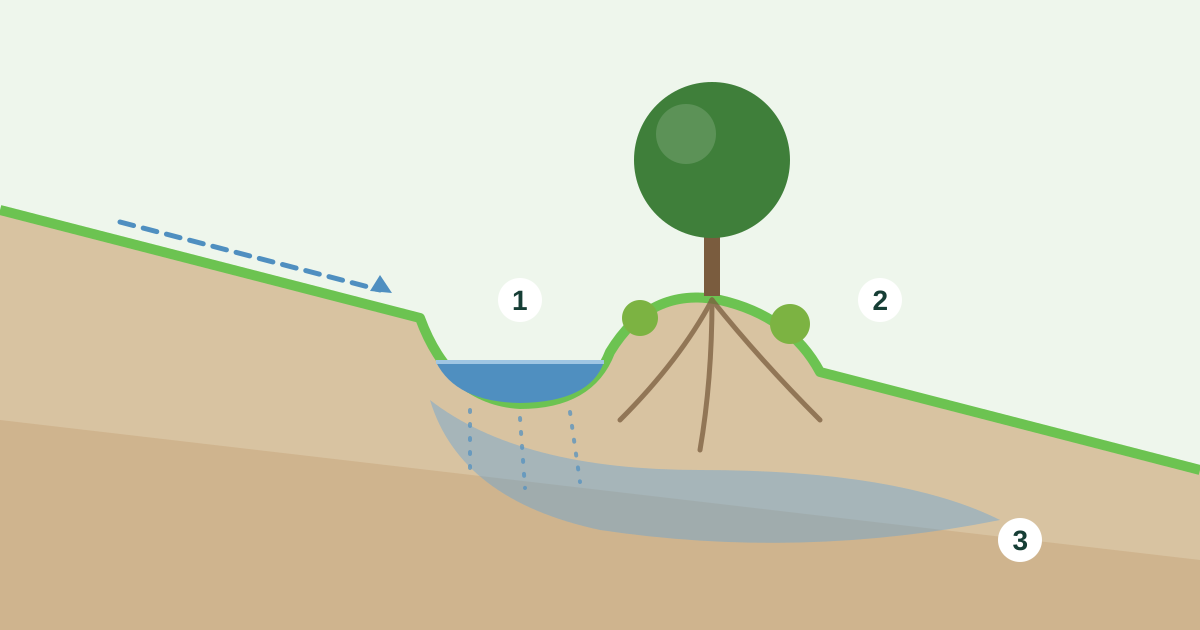
To build a swale, you mark a level line across the slope, dig a shallow trench along it, pile the soil into a berm on the downhill side, and give it a spillway: a level, protected low point where water leaves when the swale is full. The trench catches water running down the slope and lets it soak in slowly, so trees on and below the berm can drink long after the rain stops. The level line and the spillway are the two things that decide whether a swale works, and both are covered step by step below.
New to water harvesting? Start with the overview of water harvesting in the garden.
What a swale is, and what it isn't
A swale is dug on contour, meaning the bottom of the trench is level along its whole length. That's what makes the water stop, spread out and sink in, instead of flowing along the trench to one end.
A trench dug with a slight fall on purpose is a different thing: a diversion drain, used to move water slowly from one place to another. Good Life Permaculture suggests a fall of about 1:400 (1 cm for every 4 metres) for that job. Don't mix the two up: a swale that is accidentally off-level becomes a drain that dumps all its water at its low end.
Is your site right for a swale?
Swales are powerful, and on the wrong site they can do damage. Check these first:
- The slope isn't steep. Swales are for gentle slopes. Tenth Acre Farm's author treats a 1-in-10 slope as already steep and used terraces with log checks on a 13% slope instead. On steep ground, build where the hillside flattens out, or use terraces and many small basins.
- The soil drains. Dig a hole about 30 cm deep, fill it with water, let it drain, then fill it again and time it. If the water is still there after a day or two, the soil (often heavy clay) can't take a swale's worth of water.
- No high water table, and the ground doesn't stay waterlogged all winter.
- Keep your distance. Stay at least 3 metres from buildings and well back from the edge of a steep drop or a septic field (Tenth Acre Farm suggests about 5.5 metres, or 18 feet). A swale pushes water into the ground, and you don't want it pushing water towards a foundation.
When in doubt, especially on clay above a house, ask a professional to look at the site before you dig.
Tools for finding the contour
- A-frame level: three sticks joined into an "A", with a string and a weight hanging from the top. When the string crosses the mark in the middle of the crossbar, the two feet are level. Legs about 1–2 metres apart are easy to work with.
- Water level (bunyip): a long clear hose filled with water and fixed to two marked posts. Water finds its own level, so when it reaches the same mark on both posts, they stand at the same height. It's cheap and works around corners.
- Laser level: fastest, and one person can mark a long line alone. It's expensive to buy, but can be rented.
Used carefully, all three are accurate. The simple ones just take longer.
Step by step
- Observe. Watch the slope in heavy rain: where does water enter the garden, where does it run, and where does it pool?
- Decide where the overflow will go before you dig. More on that in the next section.
- Mark the contour. Start at one end and walk the A-frame (or water level) across the slope, placing a stake every time both feet are level, roughly every 2 metres. If the ground dips or bumps, move the leg sideways until you find a level spot. A wiggly line is fine; the land is wiggly too.
- Strip the topsoil from where the trench and berm will go, and set it aside.
- Dig the trench along the stakes. For a home garden, a common size is about 15–45 cm deep and 45–60 cm wide, but the right size depends on how much water reaches it. You can always enlarge it later.
- Build the berm from the dug soil on the downhill side. Shape it into a rounded mound with no steep edges, and compact it lightly. Then spread the saved topsoil over it.
- Check the trench bottom with the A-frame and fix any high or low spots, so it's level from end to end.
- Build the spillway (see below).
- Mulch and plant straight away, so the bare soil isn't washed away by the first rain.
- Test it in the first big rain. If water overtops the berm anywhere other than the spillway, make the trench deeper, wider or longer, or add another swale higher up.
Where to put the spillway
Every swale needs a spillway, because sooner or later a storm will bring more water than it can hold. Brad Lancaster's principle applies: always plan an overflow route, and use the overflow as a resource. Here's how to place it:
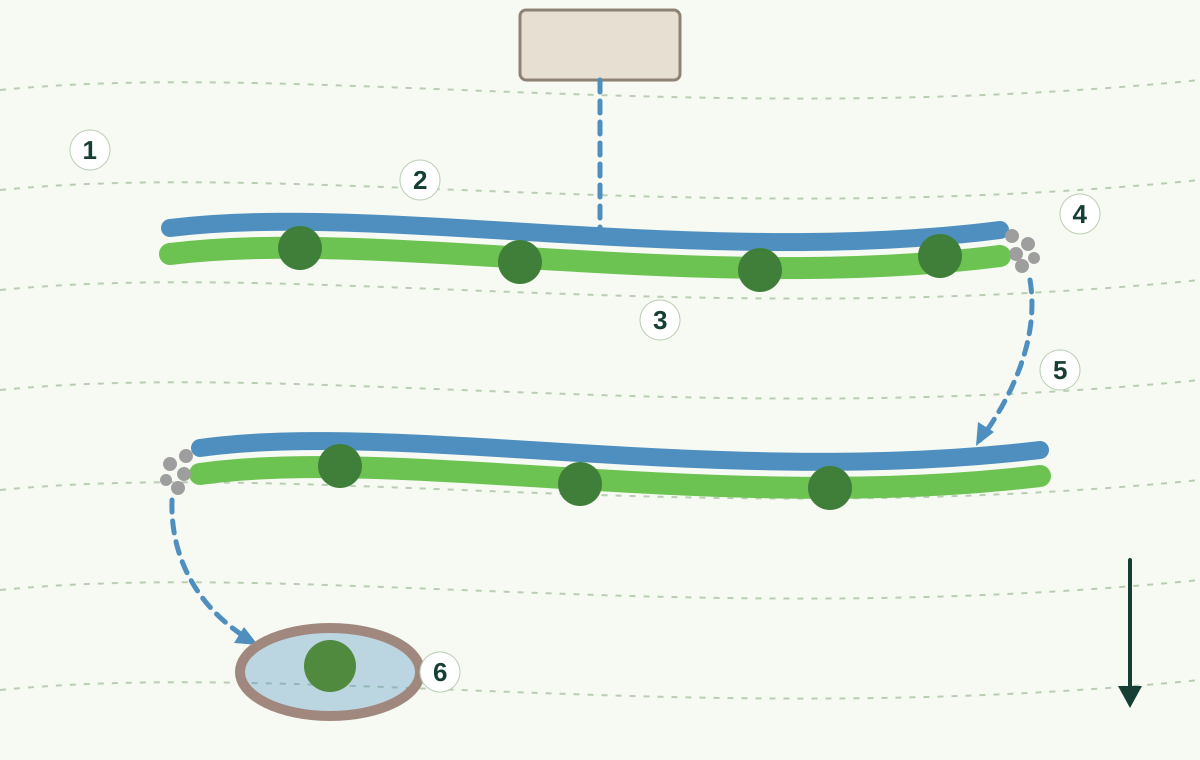
- At the end of the swale, on firm, undisturbed ground, not in loose fill or on the fresh berm, which would wash out.
- Slightly lower than the top of the berm, a few centimetres is enough, so the spillway is always the first place water leaves. If the berm has a low spot, water will find it first and cut through.
- Level and wide, so overflow leaves as a thin, slow sheet rather than a fast stream. A spillway as wide as the trench is a good start.
- Protected with flat stones, gravel over a firm base, or dense grass and groundcover, so overflow doesn't scour a channel.
- Pointing somewhere useful and safe: the next swale down, a rain garden, a basin around a tree, or a mulched bed. Never towards the house, a path, a neighbour's land or the edge of a steep slope.
- Alternating ends when you have several swales one below the other. If the upper swale overflows at its right end, put the lower swale's spillway at its left end. The water then travels across the slope and spends longer soaking in, and overflows never stack up on one line, which is how gullies start.
Planting the swale
Plant perennials with deep roots: fruit trees, nitrogen-fixing shrubs, and groundcovers and herbs beneath them. In most climates the berm is the place to plant, because the roots reach the water stored under it without sitting in it. In very dry places, such as Israel's Negev or the Arava, planting in or right at the edge of the trench gives plants the most water.
Mulch the trench and berm well. In a Mediterranean climate, build and plant at the start of the rainy season, so the roots can follow the water down before summer.
Looking after it
Walk your swales after every big storm, and at least twice a year. Look for water topping the berm, erosion at the spillway, low spots, and silt filling the trench. Clean out silt, re-level where needed, and add mulch. As the trees grow, a swale works better every year.
Planning swales in Megumi Planner
In Megumi Planner you can draw swales over your site plan, add spillways, rain gardens and basins, and plant the berm with real tree sizes. Flow lines show which way water runs down your slope, so you can see where a swale will catch it. Running a simulated rainstorm shows where the water goes when each swale fills, which is the easiest way to check your spillways before you pick up a shovel.
All the tools for a whole permaculture design – zones, swales, rain and guilds – are on one page: permaculture design software.
Frequently asked questions
How long should water stay in a swale?
It should soak away within a day or two after rain. If it stands much longer, the soil drains too slowly for a swale there, and standing water invites mosquitoes.
Does a swale work on flat ground?
On flat ground, little water runs off, so a swale has little to catch. Mulch, basins and a rain garden that collects roof water do more there.
How far apart should swales be?
It depends on the slope, the soil and the rainfall. On a slope that sends a lot of water down, Tenth Acre Farm suggests about 5.5 metres (18 feet) between swales; on gentler ground they can be further apart. Watch how the first one performs before you add more.
Sources
- How to Build a Swale in the Home Landscape – Amy Stross, Tenth Acre Farm
- How to Find Contour Lines: Low-fi & High Tech Options – Hannah Moloney, Good Life Permaculture
- Using an A Frame – Permaculture Association (UK)
- The Eight Rainwater-Harvesting Principles – Brad Lancaster, HarvestingRainwater.com
Keep reading
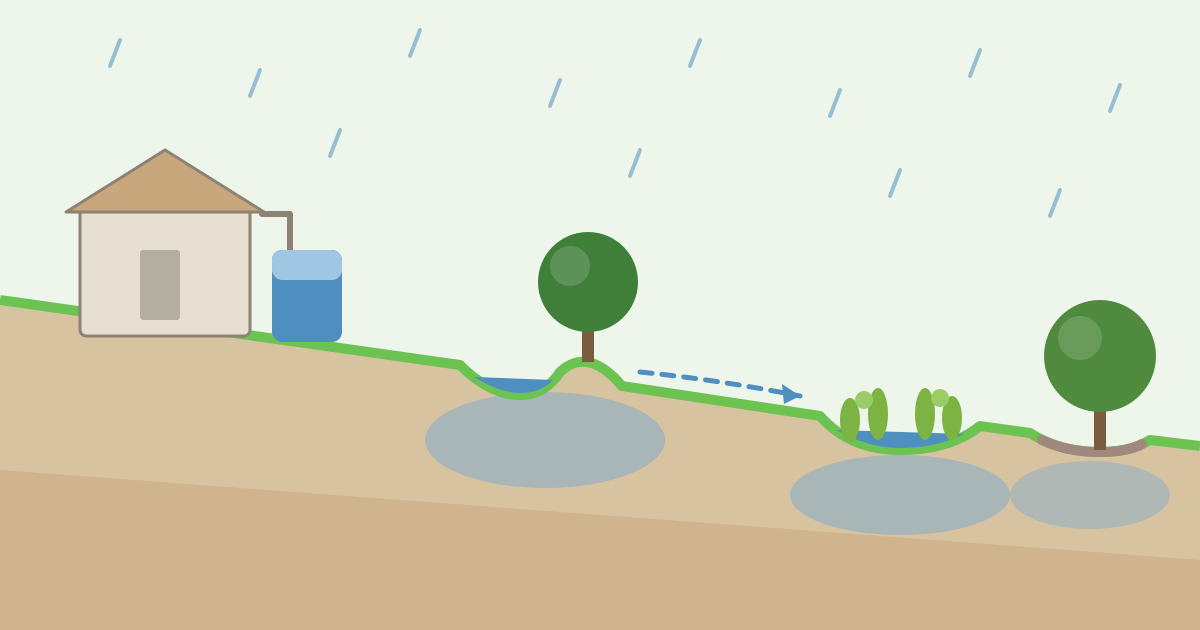
Water Harvesting in the Garden: A Permaculture Overview
Swales, spillways, rain gardens, basins, tanks and mulch: a short overview of how a permaculture garden catches rain, slows it down and stores it in the soil.
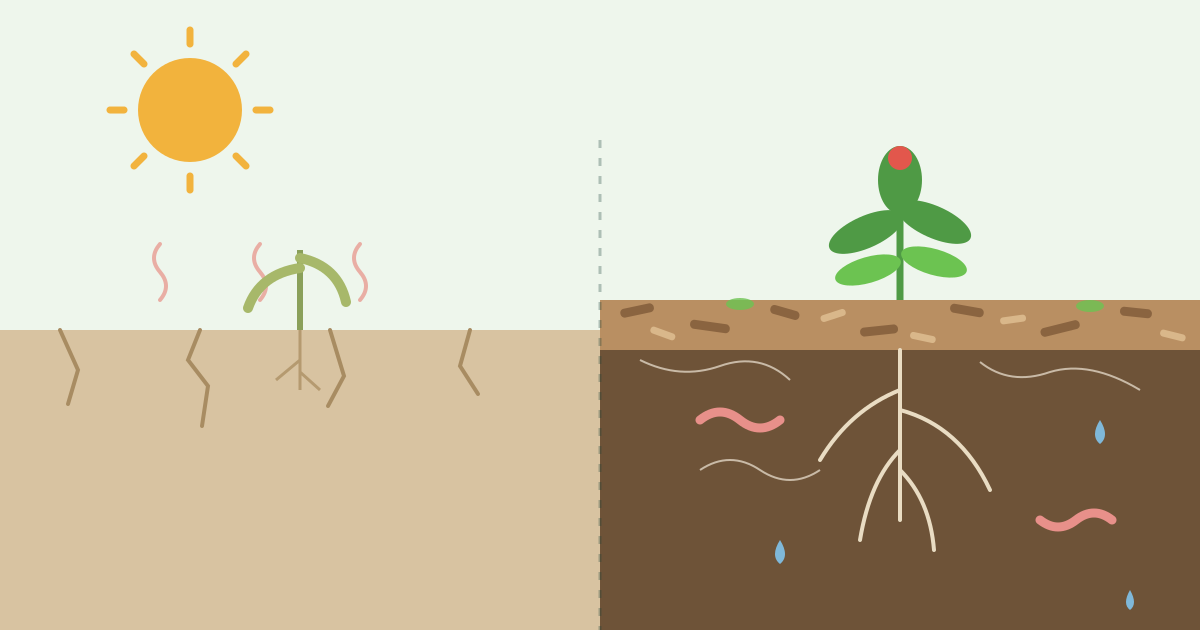
Mulch in the Garden: Why It Matters and How to Use It
Why mulch is the most useful thing you can do for garden soil, what the Back to Eden wood chip method teaches, which mulch to use where, and how deep to lay it.

What Is Permaculture? Ethics, Principles and Pioneers
What permaculture is, where it came from, how Bill Mollison and David Holmgren started it, its three ethics and 12 principles, and how to use it in your garden.