
How to Plan a Community Garden, Step by Step
How to plan a community garden: the group, the land and permits, the site survey, plots and shared areas, water, budget and rules – and one shared plan for all.
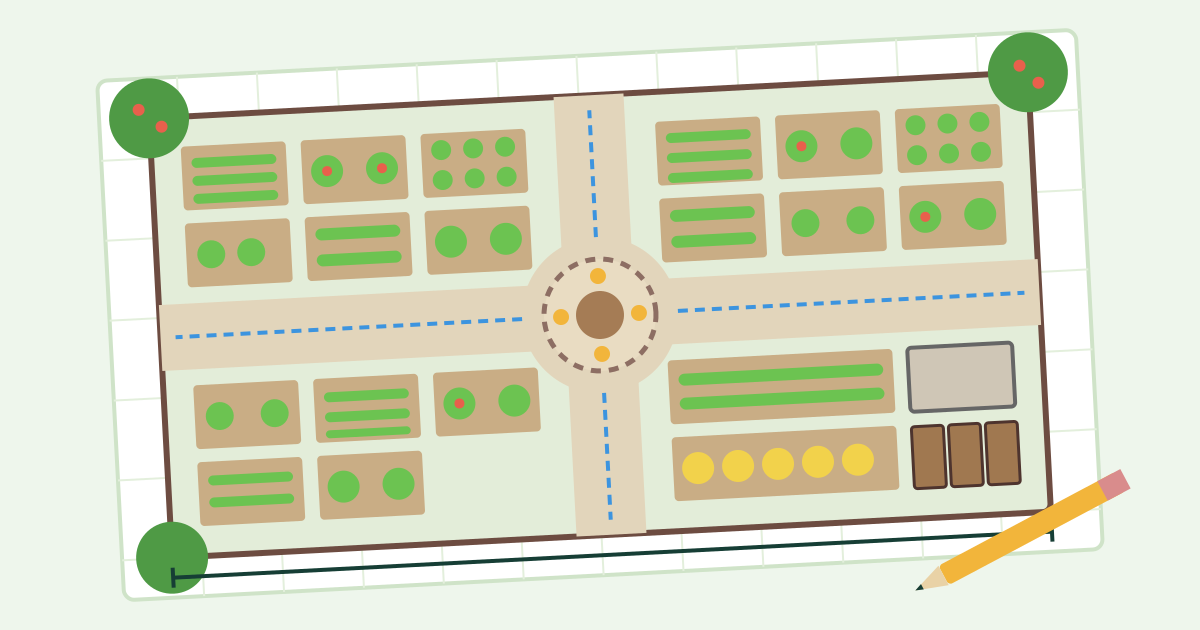
To plan a community garden, start with the people, then the land, then the drawing. Gather a small committed group, find a sunny site with water and the owner's permission, ask everyone what they need, and only then lay out the plots, the paths and the shared areas – compost, tool shed, shade and seating. Finally, agree on rules and a budget in phases. A community garden involves many partners: residents, the municipality, a school, sponsors. So the most useful thing you can make is one accurate plan that everyone can see and talk about. The second half of this article shows how to make that plan in Megumi Planner.
Start with people, not land
The most common way a community garden fails is not pests or drought. It's an empty garden. Extension services in the US warn about the same story again and again: a few organisers find land, build beds and bring in soil, and then the gardeners don't come. Their advice is to pull the people together first, get commitments, and only then build.
- A core group of 3–5 people is enough to start (NC State Extension suggests at least five committed people for what is usually a project of several years). Look for a mix: someone who knows gardening, someone good with paperwork and authorities, someone who talks to everyone.
- Hold an open meeting for the neighbourhood. Invite the people who live closest to the site, the local school and community centre, and any gardening groups nearby.
- Decide how you'll decide. Write down who represents the group to the land owner, how decisions are made (majority, consensus, a committee) and who keeps the money. It sounds formal, but it prevents most later arguments.
- Expect it to take time. The University of Maine notes that it can take more than a year from the first meeting to the first harvest.
Find the land and get permission
Look at more than one site – your chance of success grows if you start with two or three options. For each one, find out:
- Who owns it and whether they will give written permission. Extension guides recommend an agreement for at least three to five years, because a garden needs time to pay back the work.
- What the land is zoned for and whether a garden is allowed there.
- Who is responsible if someone gets hurt. Land owners often ask for liability insurance and a signed "hold harmless" clause from each gardener. A municipality or a sponsoring organisation can sometimes add the garden to its own policy.
In Israel, most community gardens grow on municipal land, and many cities support them. Tel Aviv–Yafo's process is a good example: a group of residents forms, chooses one representative, and contacts the city's urban agriculture coordinator. The city checks the site with its departments, approves it, and plans the work together with the residents. According to the city's page, it can then help with professional guidance, a water source and irrigation, plants from the municipal nursery, basic tools and a composter. Ask your own municipality – usually its environment or sustainability department – whether it has a similar procedure.
Read the site before you draw anything
Walk the site together at different times of day and write down what you find:
| Check | What you're looking for |
|---|---|
| Sun | At least 6 hours of direct sun for vegetables; 8 or more is better. Note shade from buildings and trees, especially in winter when the sun is low |
| Water | A tap or a place to connect one, and who pays for the water. A garden without easy water rarely survives an Israeli summer |
| Soil | Drainage after rain, depth, rubble. On urban land with an unknown history, test the soil for lead and other contaminants before growing food |
| Access | A gate close to the street, room to unload compost and soil, a route for a wheelbarrow |
| Accessibility | A level, firm path from the gate for wheelchairs, walkers and strollers |
| Neighbours | Windows and balconies that overlook the site, noise, where people already cut across |
| Shade for people | Existing trees to sit under, or a place for a pergola |
If the soil test shows contamination, or the ground is rubble, you don't have to give up the site. Extension services recommend growing food in raised beds filled with clean soil and compost, sometimes with a barrier at the bottom. Our article on no-dig raised beds shows how to build them.
Ask everyone what they need
Before anyone draws a bed, ask the future gardeners what they want. A short questionnaire or an evening with paper and coloured pens works well. Ask:
- Who will garden – families, older people, children from the school, people with limited mobility?
- Do people want their own plot, a shared plot that everyone works together, or both?
- What do they want to grow: vegetables, herbs, flowers, fruit trees?
- What else should the place offer: a shaded place to sit, a children's corner, a place for events, a seed-swap shelf?
- How much time can each person give each week?
The answers decide the layout. A garden of busy young families needs small plots near the gate and a play area within sight. A garden that serves a school needs a shared plot big enough for a whole class.
Lay out plots and shared areas
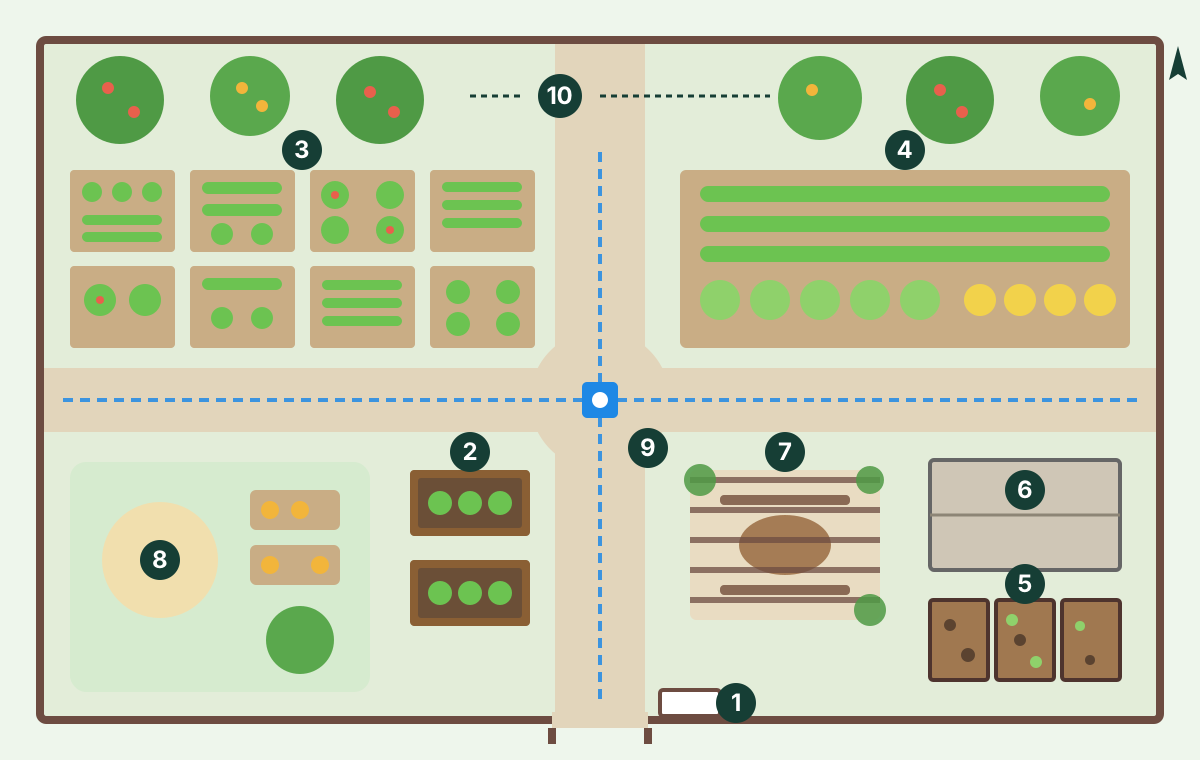
Private and shared plots
Most community gardens combine both:
- Private plots give each household responsibility and a reason to come. Extension guides describe plots of about 10–45 m² (100–500 sq ft); a common size is 3 × 6 m (10 × 20 ft). For beginners, a smaller plot of 3–10 m² is often better than a big one that gets out of hand by June.
- Shared plots grow what needs space – pumpkins, corn, melons – or produce for a food bank, and they give the group a common project.
Number every plot on the plan from the start. When a plot is handed over or abandoned, everyone knows which one it is.
Paths and accessibility
- Paths between plots: at least 90 cm (3 ft), so a wheelbarrow passes without trampling beds. NC State Extension puts it simply: wide paths make good neighbours.
- One main path of 1.5 m (5 ft) from the gate, with a firm, level surface (compacted fine gravel or paving rather than loose bark), so that a wheelchair can enter and turn. Accessibility guidelines such as Vancouver's ask for this on at least one route.
- Tall raised beds near the gate, 60–75 cm (24–30 in) high, for gardeners who can't kneel. Keep them no wider than 60 cm if they can be reached from one side only, or 120 cm if they can be reached from both.
The shared areas
Reserve space on the plan for every shared area you'll want, even the ones you can't afford yet:
- Compost bays – three bays (filling, maturing, ready) close to the plots and the path, not next to the seating.
- A tool shed that locks, near the gate.
- Shade and seating – in Israel this is not a luxury. A pergola, a shade sail or a tree turns the garden into a place people stay.
- A children's corner within sight of the plots.
- A notice board at the gate, with the rules, the work-day calendar and a phone number.
- Fruit trees and hedges on the edges, placed so they don't shade the vegetables. In Israel that usually means the north side. Our article on plant guilds explains how to plant them with support plants around them.
Water and irrigation in a hot, dry summer
In Israel's climate, water decides whether a community garden lives through its first summer. Hand watering depends on people being there every day in August, so plan drip irrigation on a timer from the start:
- One water point and a valve box in the centre, with a main line along the paths.
- A separate valve (or tap) for each section – private plots, shared plot, trees – because they need different amounts of water.
- Drip lines in the beds and drip rings around the trees.
- Mulch everything. A thick layer of mulch keeps the soil cool and cuts evaporation sharply; see mulch in the garden.
Decide early who pays for water and how. Some cities provide it, while elsewhere the group pays a shared bill out of membership fees.
Budget and phases
You don't have to build everything at once. A garden built in phases is cheaper to start and easier to fix:
- Phase 1: permission, soil test, water point, fence and gate, main paths, the first plots and compost bays.
- Phase 2: tool shed, shade and seating, tall raised beds.
- Phase 3: fruit trees, children's corner, events area.
Typical budget lines: water connection and meter, irrigation parts, fencing, soil and compost, wood or blocks for raised beds, tools, seeds and seedlings, shed, shade, signs, soil tests and insurance. Funding usually comes from a mix of membership fees, the municipality, local businesses and grants. Many gardens ask for a small deposit with each plot, to pay for clearing it if it's abandoned.
Rules, maintenance and the season calendar
Write down a few simple rules, ask every gardener to sign them, and apply them to everyone in the same way. Typical rules from extension guides:
- Plant your plot by a set date and keep it tended. After a warning, an abandoned plot goes to the next person on the waiting list.
- Pick only from your own plot (and from the shared plot on harvest days).
- Tall crops only where they don't shade a neighbour's plot.
- No chemical pesticides or herbicides – in a shared garden, spray drifts. Tel Aviv–Yafo's gardens, for example, follow ecological principles without chemicals.
- A few hours of shared work a month: compost, paths, the shared plot.
Then plan the year. In most of Israel there are two main vegetable seasons: winter crops sown and planted from September to November, and summer crops from March to May. Hold the big work days just before each of them, and give the summer a watering rota for weeks when many gardeners are away.
Common mistakes
- Building before there's a group – the beds stay empty.
- No water plan – the garden dies in its first heat wave.
- Plots too big for beginners, who give up by midsummer.
- Paths too narrow – no wheelbarrow, no wheelchair, and fights over trampled beds.
- Forgetting shade for people.
- Every partner has a different picture in mind. The municipality approved one thing, the residents imagine another, and the sponsor saw a third sketch. This is where a shared, accurate plan helps most.
Planning the community garden in Megumi Planner
A community garden has many partners, and each one asks different questions. The municipality wants to know where the fence and the water connection go. Residents want to know which plot is theirs and where the children will play. A sponsor wants to see what the money buys. Hand-drawn sketches look different in every copy and rarely have true measurements. A plan drawn to scale, which everyone opens from the same link, gives all of them the same picture. Here is how to make one, using features that the editor has today (see all the steps on the Features page).
1. Bring in the real site at its true size
Start a new project and import a plan of the site: a survey or municipal plan as a PDF or image, an aerial photo, a CAD drawing (DXF) from the city's engineer, or a plot outlined in Google Earth (KML/KMZ). Then set the scale by clicking the two ends of a distance you know, such as the length of a fence or a dimension line. A DXF or a Google Earth file is already at its true scale, and a Google Earth file also sets the garden's location, which the sun and climate tools use.
From this moment, every plot, path and bench you draw has its real size, and you can measure any distance on the plan – useful when the municipality asks exactly how large the site is and where the garden's edge will run.
Choose a garden type that offers the tools you need. The Permaculture design type offers every tool, including the composter and garden seating; the Vegetable garden type keeps the menus shorter.
2. Draw what's there, and the shared areas
From Structures, draw the fence, the existing buildings and trees, then the shared areas: paths and paving, a shed, a pergola, compost bins, a water tank, a table with chairs. Areas that have no ready-made shape, such as the children's corner or an events lawn, can be drawn as a custom shape or a lawn. Give each one a label – "Children's corner", "Tool shed", "Notice board" – so anyone reading the plan understands it without you there.
3. Lay out the plots and the beds
Draw the raised beds and planting areas (the Mulch bed / planting area outline works for plots in the ground) and give each one a name, such as "Plot 7 – the Levi family" or "Shared plot". Then plan the shared plot or a demonstration bed square by square: the plant list puts first what can be planted this month, points out good and bad neighbours, and each bed can have its own summer and winter layout. Measure paths with the measuring tool to check that they are really 90 cm and 1.5 m wide. Our article on square foot gardening explains the square-by-square method.
4. Check the sun and the shade
Set a date and move the sun across the day to see the shadows of the buildings, the fence and the trees as they grow. The shade map colours the ground by hours of direct sun – under 3 hours, 3–6 hours, and 6 hours or more – so you can see which plots will really get enough light for vegetables, and which spot will be shaded in July for the seating area. Check a date in December too, when the sun is low and the shadows are long.
5. Plan the water
Place the water source and the valve, draw the main line along the paths, then drip lines in the beds and drip rings around the trees (one click adds rings to all of them). The plan marks the pipe sizes, and the parts list counts the metres of pipe and the drippers. That gives you a real shopping list for the irrigation budget, rather than a guess.
6. Share a view-only link and collect feedback
The Share button creates a view-only link that you can send on WhatsApp, Facebook or email. Anyone can open it on a phone or computer without an account: they can move around the plan, tap a bed or structure to see its name, open the plant list and measure distances themselves. They can't change anything. A few details matter for a community garden:
- You choose what viewers see. The address and exact location, the client's name and your notes are off by default, and you can hide the site photo. That matters when the link goes to a public neighbourhood group.
- The link shows a saved version. After a planning meeting, you change the plan and press Update link, and everyone sees the new version at the same address.
- You decide when it expires, and you can stop sharing at any time.
A practical routine: send the link to the residents' group a week before each meeting, ask for comments by plot number, and bring the updated plan to the meeting. Send the same link to the municipal coordinator, the school principal and the sponsors, so they all respond to the same plan. The link doesn't collect comments itself, and only the plan's owner can edit it, so agree who holds the plan and gathers the feedback.
7. Produce a document for approvals and fundraising
The Garden plan document turns the design into pages you can print or save as a PDF: a cover with the garden at maturity, the existing site, the planting plan with a numbered plant schedule, sun and shade, the irrigation plan with its parts list, a page for each raised bed with its size, its plants and the soil needed to fill it, a seasonal calendar and care through the year. Attach it to the request to the municipality, use it in a meeting with a sponsor, or print one copy for the notice board. The quantities in it – metres of pipe, number of plants, litres of soil – are the basis for an honest budget.
If the municipality's engineer or an architect works in CAD, Export the plan as a DXF drawing (or as a to-scale SVG or PNG image), and the garden lands in their software at its true size.
8. Keep the plan alive through the year
A community garden changes every season: new gardeners, a plot handed over, a winter layout for the shared bed. Keep the plan up to date and press Update link, and the link in the group's WhatsApp always shows the current garden. The growth view shows how big the fruit trees will be in five or ten years, so you can check today that they won't shade the plots later. If another member of the group takes over, Save file gives them the whole project to import into their own account.
Frequently asked questions
How big should a community garden plot be?
Extension guides describe 10–45 m² (100–500 sq ft) per household, often 3 × 6 m. For beginners and small sites, 3–10 m² is often enough and easier to keep up. Leave paths of at least 90 cm between plots.
How many people do you need to start a community garden?
A core group of 3–5 committed people is enough to begin planning, plus enough future gardeners to fill the plots. Find the gardeners before you build.
Who pays for the water?
It depends on the land owner and the city. Some municipalities, such as Tel Aviv–Yafo, help with a water source and irrigation; elsewhere the group pays the bill from membership fees. Settle it in writing before you build.
Can several people work on the same plan in Megumi Planner?
Only the owner of a project edits it. Everyone else sees it through the view-only share link, which can be updated after each change. To hand the plan over, the owner saves it as a file and the next person imports it into their account.
Sources
- How to Organize a Community Garden (AG-737) – NC State Extension
- Steps to Organizing Your Community Garden (Bulletin #4300) – University of Maine Cooperative Extension
- How to Start a Community Garden: Getting People Involved (B1399) – University of Georgia Extension
- Community gardening: get started – Royal Horticultural Society
- Find a community garden and resources – American Community Gardening Association
- Community Gardens Accessibility Guidelines – City of Vancouver
- Lead in Garden Soils – UConn Extension
- Minimizing Risks of Soil Contaminants in Urban Gardens – NC State Extension
- Community gardens (Hebrew) – Tel Aviv–Yafo Municipality
Keep reading
How to Plan a Small Garden, Step by Step
Plan a small garden that works: read the sun and shade, draw it to scale, set priorities, grow upwards, choose compact plants and water well in a hot summer.
No-Dig Raised Beds: How to Build Them and Grow Vegetables
How to build a no-dig raised bed for vegetables: size, frame, cardboard and compost layers, planting without digging, feeding, weeds and drip in hot summers.
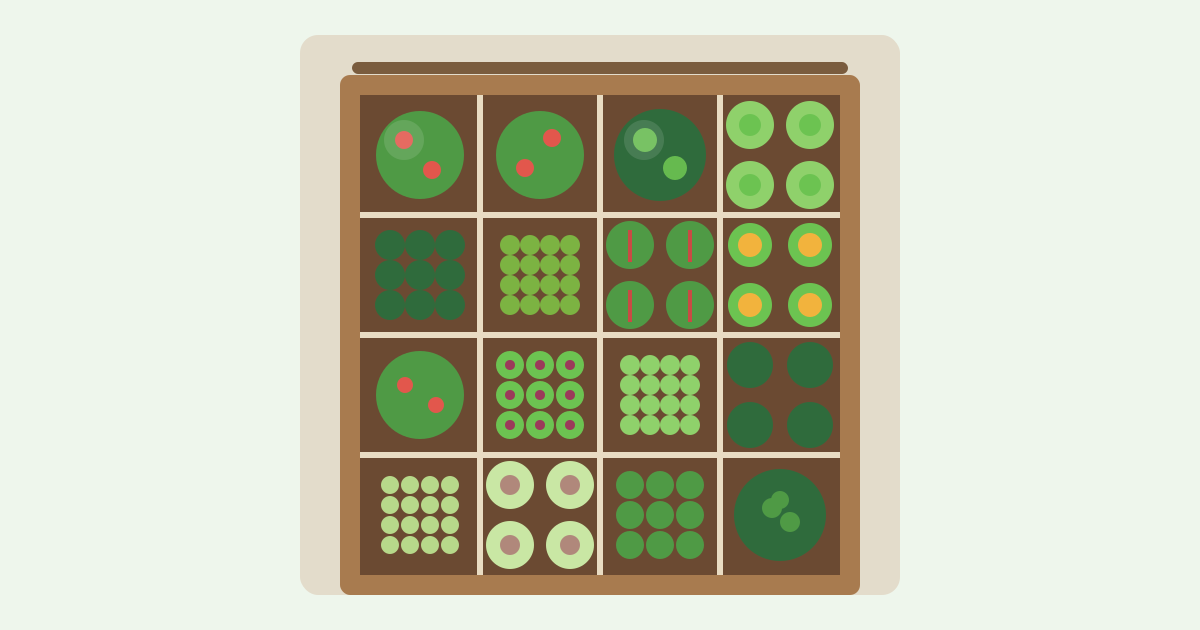
Square Foot Gardening: Grow More Vegetables in a Small Bed
How square foot gardening works: the grid, how many plants go in each square, the soil mix, a planting chart, and how to adapt the method to a hot, dry summer.